Sedans & Hatchbacks
Small Crossovers (CUVs)
Large Crossovers (SUVs)
Sports Cars
How to: Install the Genuine Mazda Roof Rack & Mouldings Guide! (2019 - 2021 Mazda3 & Mazda3 Sport)
Super easy to install at home! See the full installation guide here for Mazda's OEM Roof Rack and Cross bars for your 2019/2020/2021 Mazda3 & Mazda 3 Sport.
Mazda3 Sedan Roof Rack and Mouldings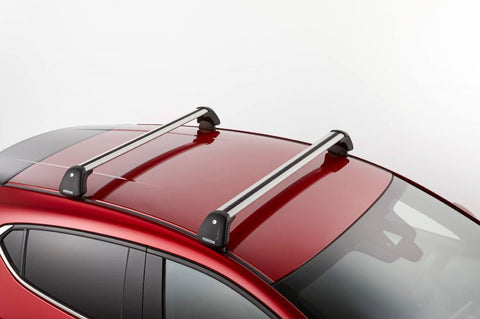
Mazda3 Sport (Hatchback) Roof Rack and Mouldings
Part Numbers and links:
2019 - 2021 Mazda3 Sedan
Roof Rack: BDEL-V3-840
Left Roof Moulding: BCYH-50-9H0A
Right Roof Moulding: BCYH-50-9L0A
2019-2021 Mazda3 Sport Hatchback
Roof Rack: BDEN-V3-840
Left Roof Moulding: BCYC-50-9H0
Right Roof Moulding: BCYC-50-9L0
Download the full installation instructions HERE.
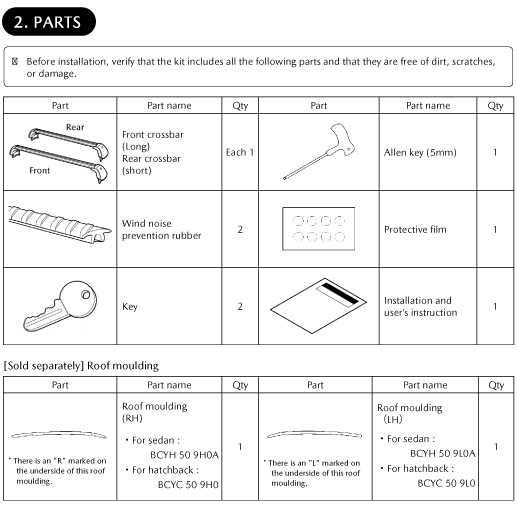
PARTS
Here are the items included in the kit:
- Front and Rear Crossbar
- Wind Noise Prevention Rubber (2 pieces)
- Key (2 keys)
- Allen key (1)
- Protective Film (1)
- Installation and user's instruction
Sold Separately
- Left Roof Moulding
- Right Roof Moulding
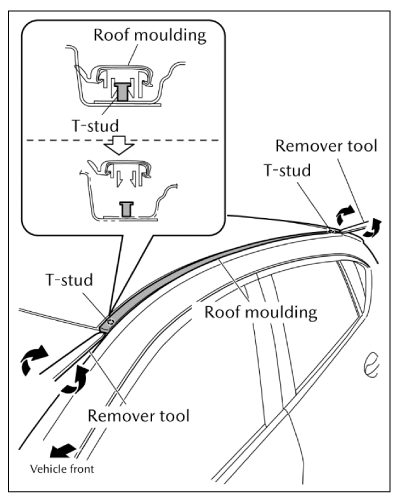
VEHICLE PARTS REMOVAL
First, remove the Roof moulding.
- Insert remover tool at position shown in illustration below and move the tool in the direction of the arrow shown to disengage the T studs from the rear moulding. (2 places at front and rear)
- Disengage the clip of the roof moulding, starting from the outside (1) and then the inside (2).
Sedan: Clip (1)
Hatchback: Clip (2)
*The removed roof moulding will not be reused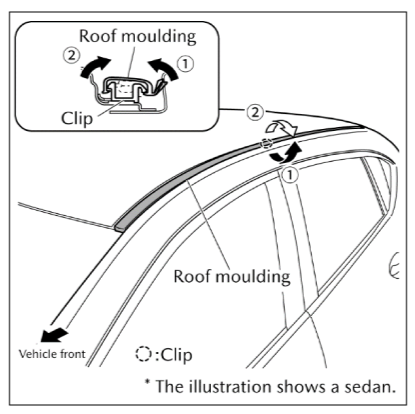


INSTALLATION
Protective Film Attachment
- Attach the protective film to the tops of the fixing bolts of the carrier bracket. (2 places)
Use a cloth to wipe down the attachment areas.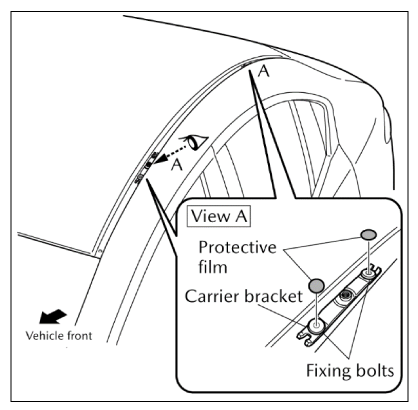

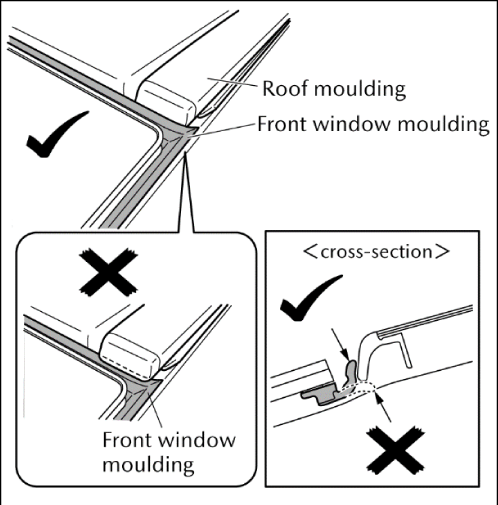
Roof Moulding Installation
- Install the roof moulding by following the "Roof Moulding Removal/Vehicle Parts Removal" procedure in reverse.
- Adjust the front and rear ends of the roof moulding so that they are underneath the window moulding as shown below.
- Slide the caps of the roof moudling to remove them. (2 places)
*Save caps for re-use in case crossbars are ever removed.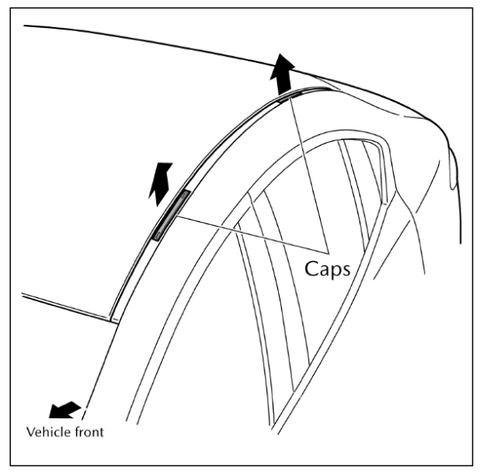


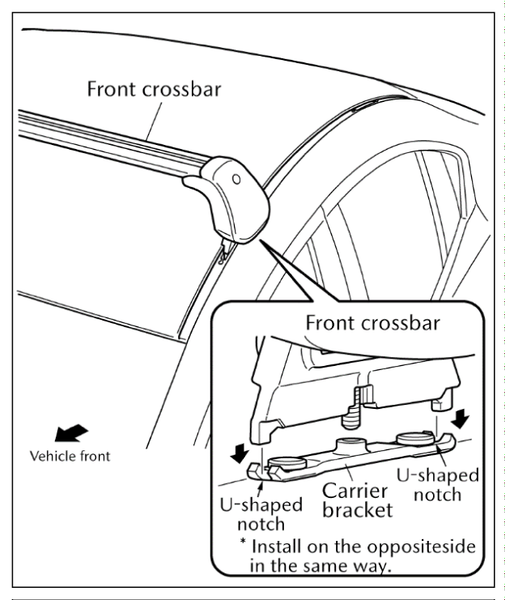
Crossbar Installation
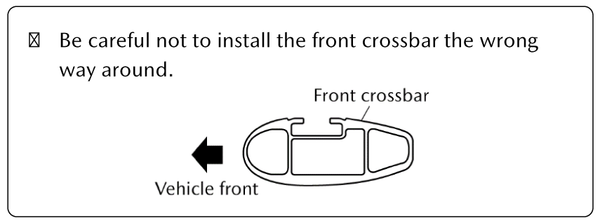
- Provisionally set the front crossbar in between the U-shaped notches in the carrier bracket. Ensure you install the front crossbar in the right direction!
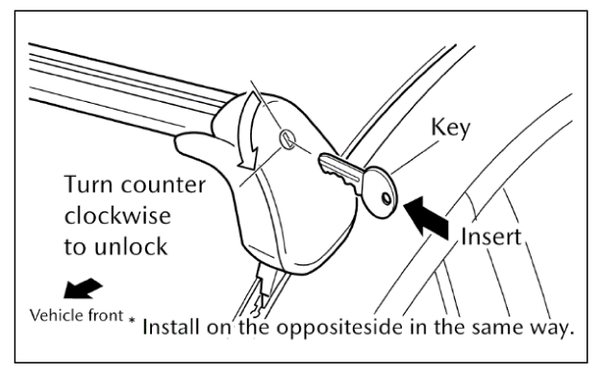
- Insert the key into the key slot in the front crossbar and unlock it.
- Open the left and right foot covers of the front crossbar. Make fine adjustments to the position of the front crossbar, and then provisionally tighten the center fixing bolts (1 each at left and right) by hand.
If the center fixing bolts are not tightened, loosen the crossbar fixing bolts to adjust the position.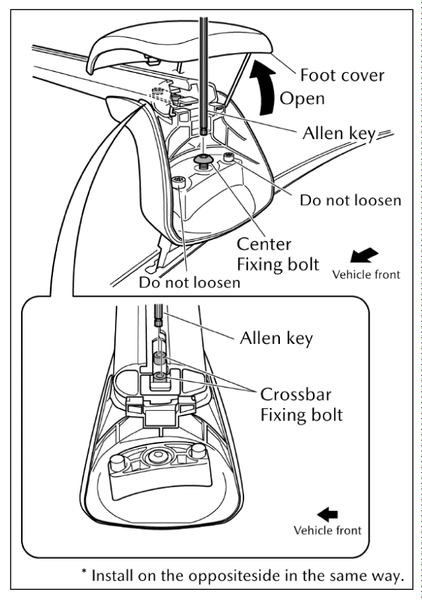
- After checking that the left and right fixing bolts are inserted straight, use the Allen key to fully tighten center and crossbar fixing bolts (3 places).
Center and Crossbar fixing bolt tightening torque: (6.0 N.m)


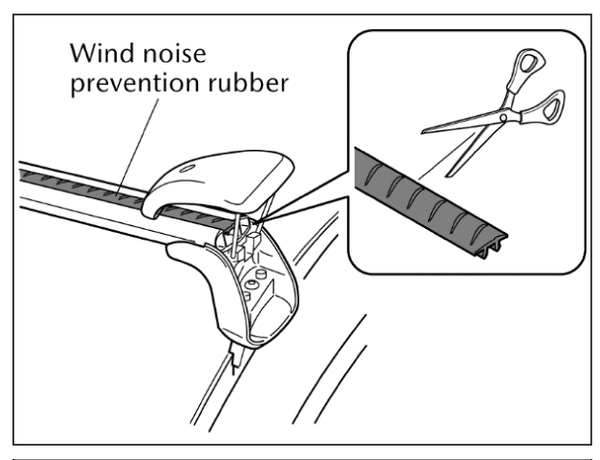
Wind Noise Prevention Rubber Installation
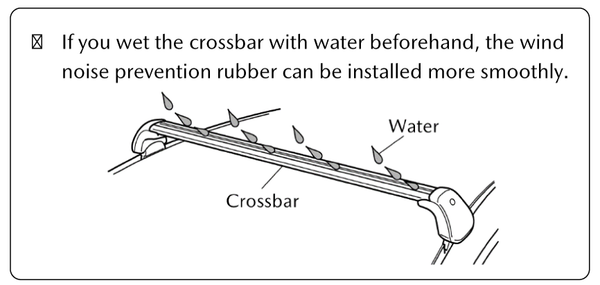
- Insert the end of the wind noise prevention rubber into the installation notch in the front crossbar, and then slide the rubber along the front crossbar while pressing down on it.
*Wetting the crossbar with water beforehand will allow the wind noise prevention rubber to be installed more smoothly.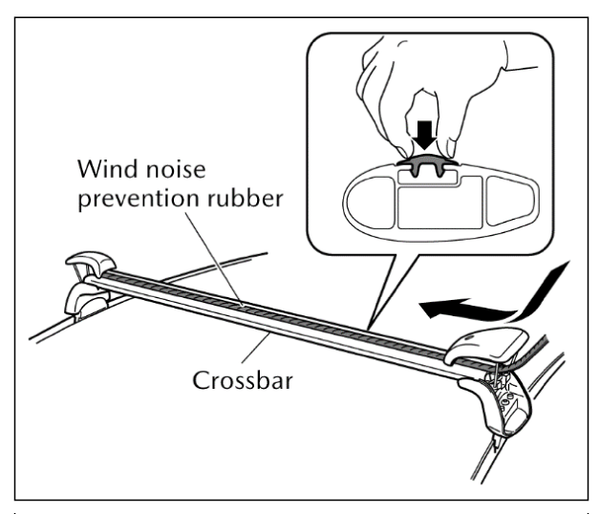
- Cut the wind noise prevention rubber to the same length as the crossbar.
- Close the foot covers to lock them. (Turn to the right)
- Install the rear crossbar to the vehicle in the same way.


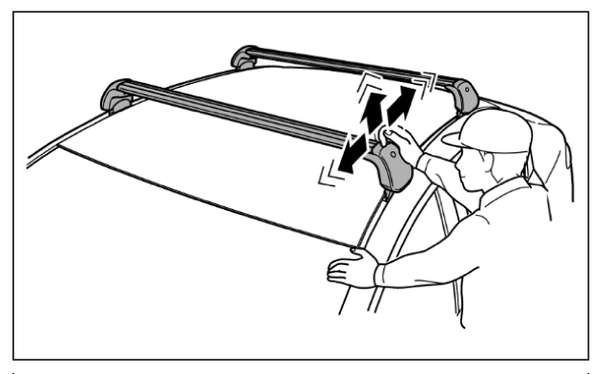
Final Check After Installation
Shake the roof rack up, down and sideways to check that it's installed securely with no play or looseness. If the roof rack moves at this time, re-check the installation positions and installation method and the tightness of all parts according to the procedures in this manual to make sure that everything is installed securely.
Notes:
- The roof rack is not designed to directly carry the weight of the load being carried, so purchase separate attachments which match the loads to be carried, and install them to the roof rack.
- The maximum laden weight is 75 kg (including roof rack (5.5 kg) and attachment). Do not overload the roof rack.
- The rood rack may become loosened slightly during initial use, so be sure to tighten it. Periodically check the roof rack for looseness. (As a guide, check after each period of driving a distance of 1000 km)
- If loading with long objects such as skis or masts, make sure they do not cause any obstruction when opening the back door.